Guides / Build a website
Make your first website
Go from an idea to a published website in Kodebloc, step by step: describe it, let AI build it, change it and put it online.
What you need
You need a Kodebloc account and an idea. That is all. You don't need to know any code, and you don't need to pay: Kodebloc is free while it is in beta. A first website takes a minute or two to build.
Before you start, think about three things: who the website is for, what it should say, and what you want visitors to do. For a bakery, that could be “people in my town”, “our cakes and opening hours” and “come and visit us”.
Step 1: Open the editor
- Sign in, or create a free account. The editor asks you to sign in first.
- Open the editor. On the left you see the AI chat tab with a message box. On the right is the preview, where your website appears.
- Above the message box you can pick a few options before the first build. They are covered in the next step.
Step 2: Choose your options
These options sit just above the message box, and only show before your first build:
- One page or Multiple pages. One page puts everything on a single long page. Multiple pages gives you a few pages, like Home, Menu and Contact, each with its own link. See websites with more than one page.
- The style menu sets the overall look: Any style, Modern, Minimal, Playful, Corporate or Luxury. Leave it on Any style and the AI picks a fresh look for each new website.
Step 3: Describe your website
Type what you want in the message box, in your own words. Say what the website is for, what to include and any colors you like. If you are not sure where to begin, the chat shows three example requests you can click to fill in the box.
“A website for Rosa's Bakery in Pune. We sell sourdough bread, cakes and cookies. Include our menu with prices, opening hours (Tuesday to Sunday, 8 AM to 6 PM), a map section with our address and a contact form. Warm colors like cream and brown.”Build this
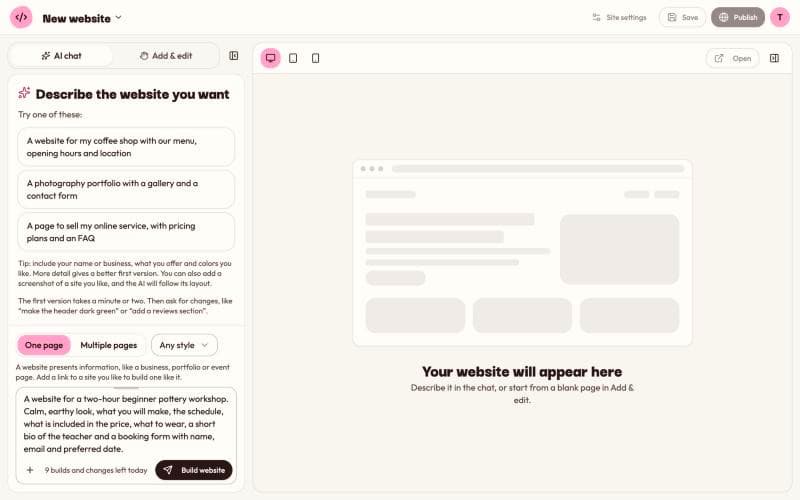
Then press Build website, or press Enter. To start a new line in the box without sending, press Shift and Enter together.
Step 4: Wait for the first version
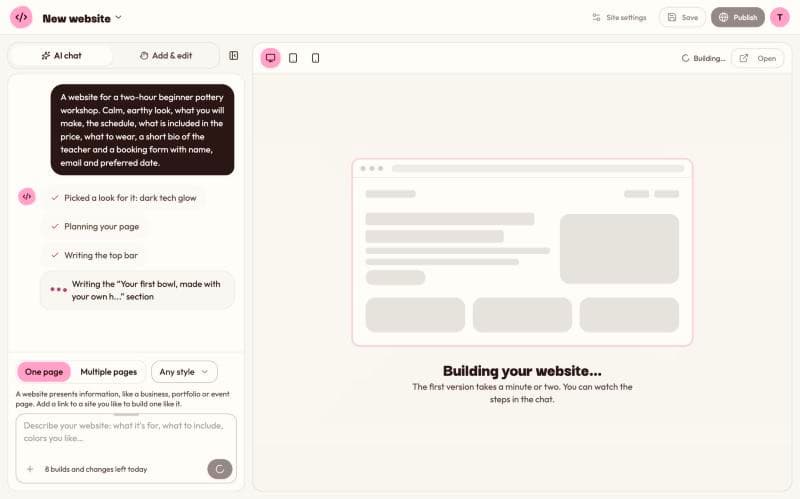
While the AI works, the chat shows each step as it happens, like “Picked a look for it”, “Planning your page”, “Writing the top bar” and one line for each section it writes. After a minute or two your website appears in the preview, and the chat shows a short description of the website it made.
Every new website gets its own fonts, colors and layout. Here is a real first build, made from the short request “A website for my bakery in Pune” with no changes afterwards:
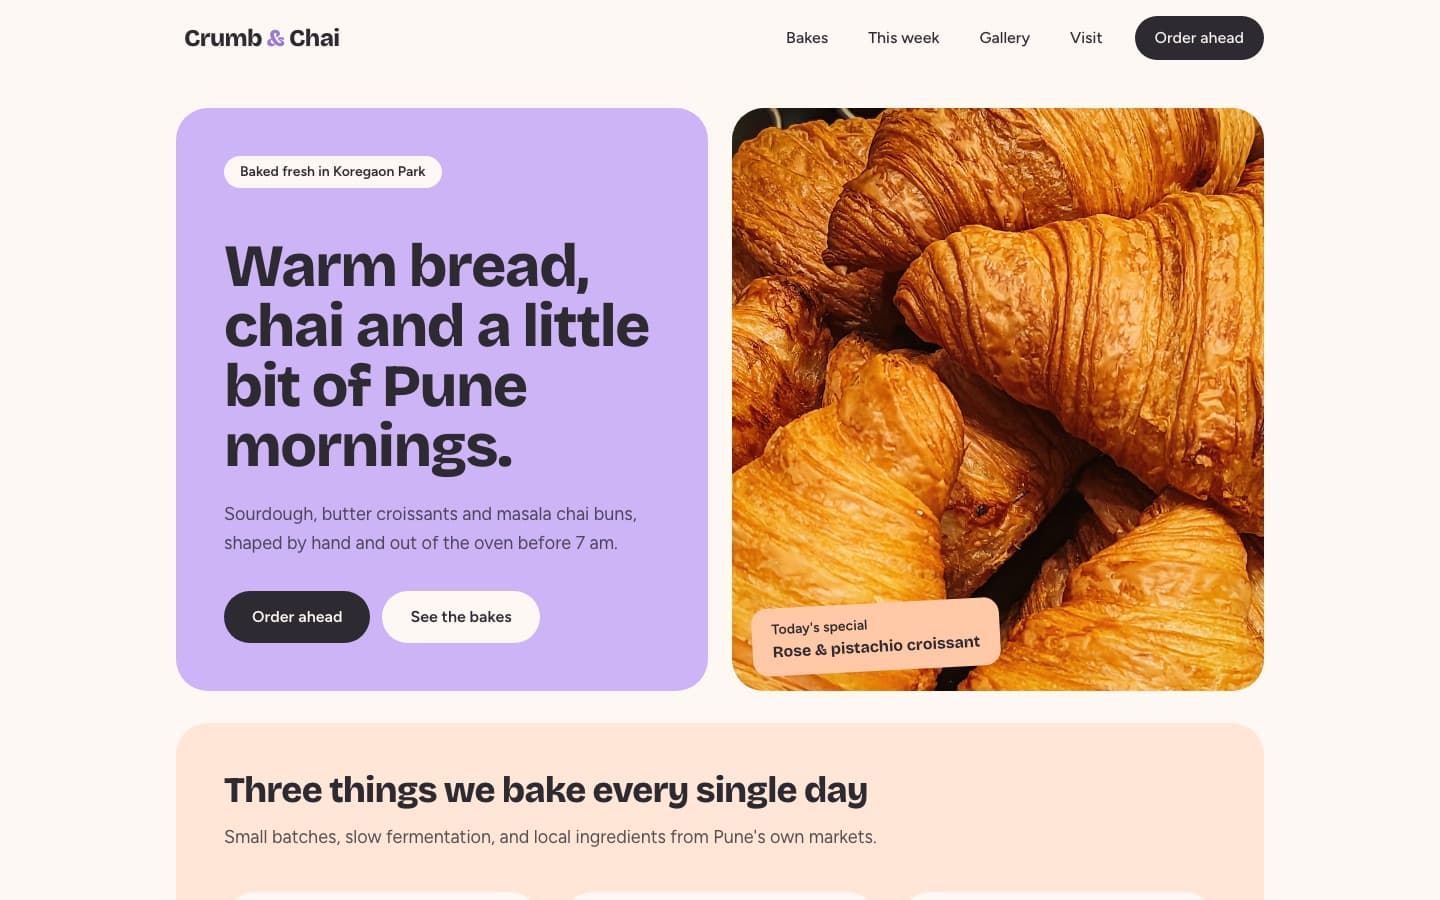
Notice that the AI made up the name. When you don't give a name, it invents one. Put your real name in the request if you want it used.
Step 5: Check it on every screen
At the top left of the preview are three small buttons with a screen, a tablet and a phone on them: Desktop view, Tablet view and Mobile view. Click each one to see how your website looks on that size of screen. Many visitors will use a phone, so check the mobile view carefully. The Open button opens your page in a new browser tab.
Step 6: Change what you don't like
After the first build, the button under the message box says Apply change. Type a change in plain words and send it:
- “Make the header dark green”
- “Add a reviews section with three customer quotes”
- “Change the opening hours to 9 AM to 7 PM”
To change just one part, like a button or a picture, click + next to the message box and choose Pick a part of your page, then click that part of your page. Learn more in change your website by chat. You can also change words and move sections yourself, with no AI request, in the Add & edit tab. See edit your website by hand.
On the Free plan you get 10 builds and changes a day, up to 50 a month. The first build counts as one, and so does each change you send in the chat. The builder shows how many you have left under the message box. Changes you make by hand don't count.
Step 7: Your work is saved
Kodebloc saves your website to My projects automatically as you work. The bar at the top shows Saved when it is up to date. To give your website a name that is easy to find, click Save in the top bar and type a name. Only you can see your projects.
Made a change you regret? Open the menu with your website's name at the top left and choose Earlier versions. See earlier versions and undo.
Step 8: Publish it
- Click Publish in the top bar.
- Give your website a name, if you like. Kodebloc makes the link from it.
- Choose whether to Show in the community gallery. It is on unless you turn it off.
- Click Publish. You get a link anyone can open on a phone or computer.
Free accounts can have 5 websites online at a time. The full details are in publish your website.
Common mistakes
- A request that is too short. “A website” gives the AI nothing to go on. Say what it is for and what to include.
- Asking for everything in one change. Ten changes in one message are harder to get right. Send one or two at a time, and check the preview after each.
- Only checking the desktop view. Look at the mobile view before you publish.
- Forgetting to update. After you publish, new changes don't go online until you update the live website. See update or take down a live website.
Still stuck?
Send us a message on the contact page and we'll reply by email.